


Introduction
If your wire straightening line is producing bow-shaped bars, scratch marks, or inconsistent cut lengths, you don’t have a production problem—you have a maintenance problem. The fastest way to boost yield, reduce scrap, and stabilize quality is a disciplined maintenance program that’s tailored to wire straightening machines. This guide gives manufacturers and maintenance teams a practical, SEO-focused deep dive: why maintenance matters, what components require attention, how to execute daily-to-annual tasks, pros & cons of different maintenance strategies, troubleshooting checklists, and the KPIs that prove your efforts are paying off.
Why Maintenance Matters for Wire Straightening Machines
A wire straightening machine works under continuous mechanical load, with high surface pressures at the rollers/dies and cyclical heating from friction. Neglect quickly shows up on your product and P&L.
Quality: Properly maintained rollers, guides, and cutters deliver straightness, roundness, and surface finish that meet spec—reducing downstream bending, welding, and assembly rework.
Throughput: Clean, aligned feed systems allow higher line speeds with fewer jams, misfeeds, and off-cut events.
Cost Control: Proactive lubrication and roller care lengthen component life, cutting spare-parts spend and unplanned downtime.
Safety & Compliance: Brakes, guards, e-stops, and interlocks work as designed only when inspected and tested.
Predictability: Stable performance (lower variability) makes planning easier, from shift staffing to heat-treat and coating schedules.
Bottom line: robust maintenance converts a temperamental line into a predictable profit center.
What Exactly Are We Maintaining?
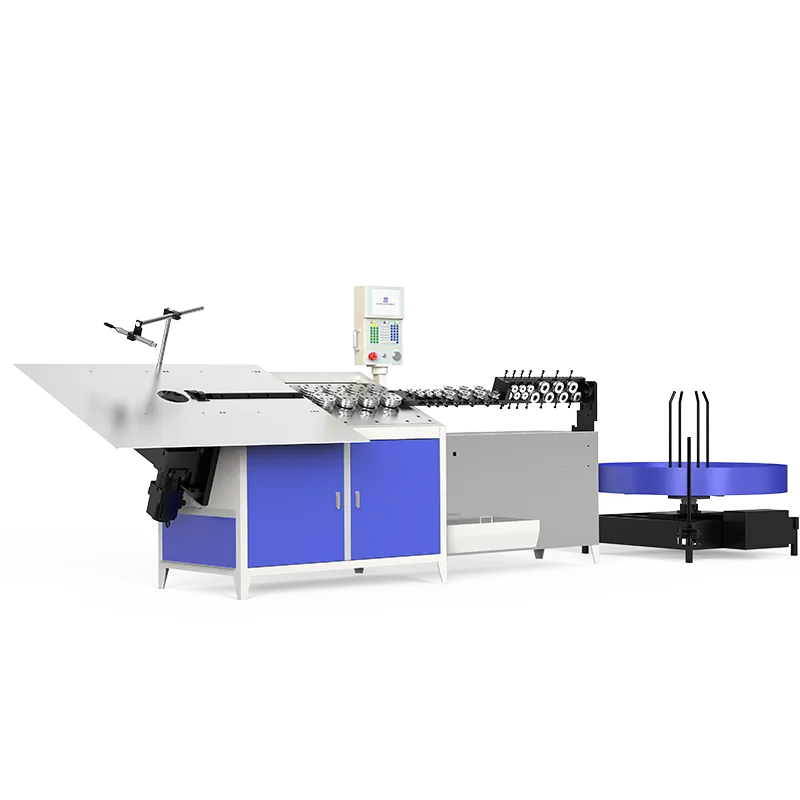
A modern wire straightening system may be a simple straightener or an integrated straightening + feeding + length measuring + cutting + collection line. Typical subsystems include:
Payoff/Decoiler: Drum or spinner that holds the coil. Key parts: brake, dancer arm, mandrel bearings.
Infeed & Pre-Guides: Entry guides, bushings, or ceramic inserts that align the wire before the straightener.
Straightening Section: Rotary (helical) or roller straightener with adjustable banks. Key parts: straightening rollers/dies, shafts, bearings, adjustment screws, depth gauges, drive motors.
Feeder & Encoder: Pinch rollers or servo feed with encoders for length control.
Cutting Unit (if present): Flying shear, guillotine, or rotary cutoff with blades, clutches, drives.
Discharge/Collection: Chutes, bins, bundle formers, count sensors.
Controls & Safety: PLC/HMI, sensors, light curtains, e-stops, interlocks, VFDs/servos.
Utilities: Lubrication circuits, compressed air, extraction/dust collection, cooling fans.
Wear-critical components
Straightening rollers/dies: Surface finish and hardness determine marking and straightness. (Typical hardened tool steel; many shops target ~HRC 58–62; follow your OEM.)
Bearings & shafts: Any play translates to variable straightness.
Guide bushings/inserts: Wear or chips cause scoring.
Cutting blades: Dull edges cause burrs, mushrooming, and length variation.
How to Maintain: A Practical, Scheduled Plan
Use this schedule as a starting point; always follow your OEM procedures and local safety rules (Lockout/Tagout, PPE, arc-flash boundaries).
Daily (Start-of-Shift) Checklist
-
Safety checks
Test emergency stop(s) and interlocks.
Confirm guards and covers are closed and latched.
-
Clean & inspect
Wipe straightening and feed rollers with lint-free cloth; remove metal fines and polymer residue.
Vacuum chips/dust around blades and sensors (avoid blasting debris with high-pressure air near bearings).
-
Lubrication spot checks
Verify automatic lube reservoirs are filled; look for oil lines leaking or kinked.
-
Quick alignment check
Run a 2–3 m sample at nominal speed; check bow and twist on a flat table with a straightedge.
If your line uses a laser straightness station, verify the sensor is reading within tolerance.
-
Cut-length sanity
Measure 10 consecutive cuts; confirm mean length and Cpk meet spec.
Weekly Tasks
-
Roller surface audit
Look for flats, scoring, pitting, or embedded chips. Light polish only if your OEM allows; otherwise replace.
-
Feeder pinch check
Verify pinch force and parallelism. Uneven pinch = slip and spot marks.
-
Encoder & length calibration
Compare encoder distance vs. a certified steel rule or gauge bar; adjust scale factor as needed.
-
Brake & dancer response
With an empty run, confirm payoff brake releases and re-applies smoothly; noisy or jerky motion indicates glazing or worn pads.
Monthly Tasks
-
Alignment verification
Use a dial indicator or laser alignment tool on straightener shafts to confirm runout and parallelism.
Record adjustment settings for each diameter recipe; drift suggests bearing wear.
-
Electrical & pneumatic health
Check terminal tightness, cabinet filters, cooling fans, air FRLs (filter/regulator/lubricator) and condensate drains.
-
Blade inspection
Inspect and rotate or replace cutoff blades; verify squareness to feed direction to control burrs.
Quarterly Tasks
-
Bearing condition monitoring
Listen for rumble; if available, log vibration and temperature. Rising RMS vibration or a temperature trend is an early warning.
-
Roll hardness & finish audit
For critical lines, spot-check roller hardness with a portable tester (if OEM permits) and verify Ra surface finish.
-
Control software backup
Export PLC/HMI programs and parameter sets; store off-machine with version/date.
Annual (or Major) Overhaul
-
Complete disassembly & metrology
Inspect shafts for wear steps; check bearing fits; replace suspect components.
-
Base frame & leveling
Re-level machine to factory targets; check floor anchors and grout for cracks.
-
Safety function proof-test
Validate e-stop category performance; test light curtains, interlocks, and safety relays to manufacturer methods.
Lubrication Map (Typical)
Straightener bearings: High-load lithium complex grease, NLGI 2 (verify OEM spec).
Open gears/cams: Light EP gear oil or OEM-approved open-gear spray.
Guide bushings: Dry film or ceramic—avoid over-oiling that traps grit.
Caution: Never apply abrasive compounds to rollers/dies; you’ll create permanent marking.
Changeover & Recipe Discipline (SMED Principles)
Standardize tools (torque wrenches, feeler gauges).
Color-code shims/spacers by diameter ranges.
Pre-stage roller sets and guides; store in labeled foam trays.
Use a digital recipe sheet: roller offsets, feed speed, pinch force, encoder factor, cutoff delay.
Troubleshooting: Symptom → Root Cause → Fix
Use these quick maps on the shop floor.
1) Wire Not Straight (Bow/Camber)
-
Likely causes
Roller bank out of alignment or unequal depth.
Worn or eccentric rollers/shafts; bearing play.
Incorrect payoff tension (coil set not neutralized).
-
Actions
Re-zero straightener, set symmetrical depth, then fine-tune.
Replace worn rollers/bearings; verify shaft runout.
Adjust brake/dancer to stabilize entry tension.
2) Surface Scratches/Score Marks
-
Likely causes
Embedded chips in rollers or dirty guides.
Rollers too hard/rough for soft materials (Cu/Al).
Misaligned entry guide rubbing the surface.
-
Actions
Clean/polish or replace rollers; clean guides.
Switch to correct roller material/finish; consider coated rollers for soft wire.
Re-center and re-bush the entry guide.
3) Length Variation or Burrs After Cut
-
Likely causes
Encoder slip or loose couplings.
Dull or mis-squared blades; inconsistent feed pinch.
Servo/VFD tuning drift.
-
Actions
Tighten couplings; recalibrate encoder.
Re-grind/replace blades; set blade squareness and pinch force.
Re-tune drive per OEM; verify acceleration and decel ramps.
4) Spiral Twist/Residual Helix
-
Likely causes
Unequal roller penetration top vs. bottom bank.
Excess entry twist from payoff.
-
Actions
Balance top/bottom/side rollers; follow the OEM penetration chart.
Add anti-twist guide at entry; stabilize payoff.
5) Vibration/Noise at Speed
-
Likely causes
Bearing failure onset; roller imbalance; loose base bolts.
Resonance at certain feed speeds.
-
Actions
Replace bearings; re-balance rollers; torque mounts.
Slightly adjust speed to avoid resonance; add damping where appropriate.
Pros & Cons of Maintenance Strategies
There isn’t a single “best” strategy—choose based on line criticality, labor, and budget.
Reactive (Run-to-Failure)
Pros: Lowest upfront effort, minimal planning.
Cons: Highest downtime cost; collateral damage to shafts/frames; quality drift before failure.
Preventive (Time-based)
Pros: Predictable schedules; easy to communicate and staff.
Cons: May replace parts early; can miss random failures between intervals.
Condition-Based / Predictive
Pros: Replace parts only when needed; early warnings from vibration/thermal data.
Cons: Requires sensors, software, and trained analysts; higher initial setup.
Practical hybrid: Time-based for safety-critical tasks (e-stops, guards), condition-based for bearings/rollers on high-speed lines.
Measurement & Calibration: Hitting the Numbers
Straightness metric: Many shops target ≤1 mm deviation per meter for general steel bar; precision applications may demand tighter. Define your spec by customer or standard.
Roundness & diameter: Use laser micrometer or calibrated calipers; record drift over shift.
Length control: Verify with a certified bar; track mean and Cpk. Investigate when Cpk < 1.33.
Roller parallelism & runout: Dial indicator method; keep a log. Sudden changes = likely bearing or shaft damage.
Material-Specific Tips
Carbon steel: Robust rollers; watch for scale—clean often to prevent scoring.
Stainless steel: Harder to mark visually—use tactile inspection; avoid chlorinated cleaners to protect corrosion resistance.
Copper/Aluminum: Use polished or coated rollers; lower penetration; keep guides spotless to prevent galling.
Coated wire (Zn, polymer): Minimize roller pressure; verify coating thickness post-run; use non-marring guides.
Cleaning & Consumables
Solvents: Use OEM-approved, non-chlorinated degreasers or 70% IPA for light residue.
Abrasives: Avoid on rollers; if permitted, ultra-fine non-woven pads only, with extreme care.
Rags: Lint-free wipes only; fibers can embed and scratch.
Filters: Replace cabinet and pneumatic filters on schedule; clogged filters raise temps and moisture.
Spare-Parts Strategy
A-list (always in stock): Straightening rollers for top recipes, bearings, encoder, blades, guide inserts, belts.
B-list (regional lead time): Shafts, couplings, servo drive, VFD, HMI panel.
C-list (factory lead time): Custom roller sets, major gearboxes, machine-specific castings.
Create min-max levels based on consumption and vendor lead times. Use barcoding to avoid “phantom stock.”
Documentation, KPIs & ROI
Maintenance log: Date, part, symptom, root cause, action, downtime minutes.
-
KPIs
OEE (Availability × Performance × Quality)
MTBF/MTTR (Mean Time Between Failures / Mean Time To Repair)
First-Pass Yield on straightness and length
Scrap rate (kg or %)
Energy per ton processed
-
Quick ROI example
Before: 3% scrap, 4 hours/month unplanned downtime.
After program: 1% scrap, 1 hour/month downtime.
If you process 1000 t/year at $800/t value, scrap savings ≈ $16,000; gained production time worth additional $X. Subtract added PM labor/parts to show net ROI.
Safety Essentials (Never Skip)
Enforce Lockout/Tagout before opening guards or reaching near moving parts.
Use proper PPE: cut-resistant gloves, eye protection, hearing protection.
Keep floors dry and clear of coils, offcuts, and oil.
Train operators to stop the line at the first sign of rubbing, squeal, or vibration—catch small problems early.
Quick Reference Checklists
Daily Start-up
E-stop test, guards secured
Clean rollers/guides, vacuum fines
Lube reservoir levels OK
Sample run: straightness and length verified
Weekly
Roller surface inspection
Feeder pinch/parallel check
Encoder scale verification
Payoff brake/dancer response
Monthly
Shaft runout and alignment
Electrical/pneumatic inspection
Blade condition and squareness
Annual
Bearing replacements as needed
Frame re-leveling and anchor check
Full safety function proof-test
FAQ (Buyer & Operator Search Intent)
Q1: How often should I replace straightening rollers?
It depends on material, speed, and cleanliness. Track surface finish and straightness drift; many shops set a threshold on Ra or a maximum hours/tons per roller set. Replace at first signs of scoring or flats.
Q2: Can I polish a roller to extend life?
Only if your OEM allows, and only with approved methods. Over-polishing changes diameter and crown, causing marks and straightness issues.
Q3: What causes length inconsistency after maintenance?
Often an encoder coupling left loose, changed pinch force, or a blade not squared to feed direction. Re-verify calibration steps after any intervention.
Q4: Do I need predictive maintenance sensors?
Not mandatory, but vibration and temperature trending on high-speed lines often pays back via earlier bearing replacements and fewer catastrophic failures.
Q5: What straightness target should I set?
Let customer specifications lead. General steel fabrication might accept ≤1 mm/m; precision applications demand tighter. Maintain a gauge study so QC and production agree on measurement methods.
Conclusion
Consistent, high-quality output from a wire straightening machine is not a mystery—it’s the reward for disciplined maintenance. Focus on clean, aligned rollers; calibrated feed and cut systems; correct lubrication; and documented schedules. Combine preventive routines with condition monitoring on critical components, measure what matters (straightness, length Cpk, downtime), and keep a smart spare-parts kit. Do this, and you’ll protect quality, throughput, and safety—while turning your straightener into one of the most reliable assets on your factory floor.
Table of Contents
- Introduction
- Why Maintenance Matters for Wire Straightening Machines
- What Exactly Are We Maintaining?
- How to Maintain: A Practical, Scheduled Plan
- Troubleshooting: Symptom → Root Cause → Fix
- Pros & Cons of Maintenance Strategies
- Measurement & Calibration: Hitting the Numbers
- Material-Specific Tips
- Cleaning & Consumables
- Spare-Parts Strategy
- Documentation, KPIs & ROI
- Safety Essentials (Never Skip)
- Quick Reference Checklists
- FAQ (Buyer & Operator Search Intent)
- Conclusion